Monday, 23 November 2015

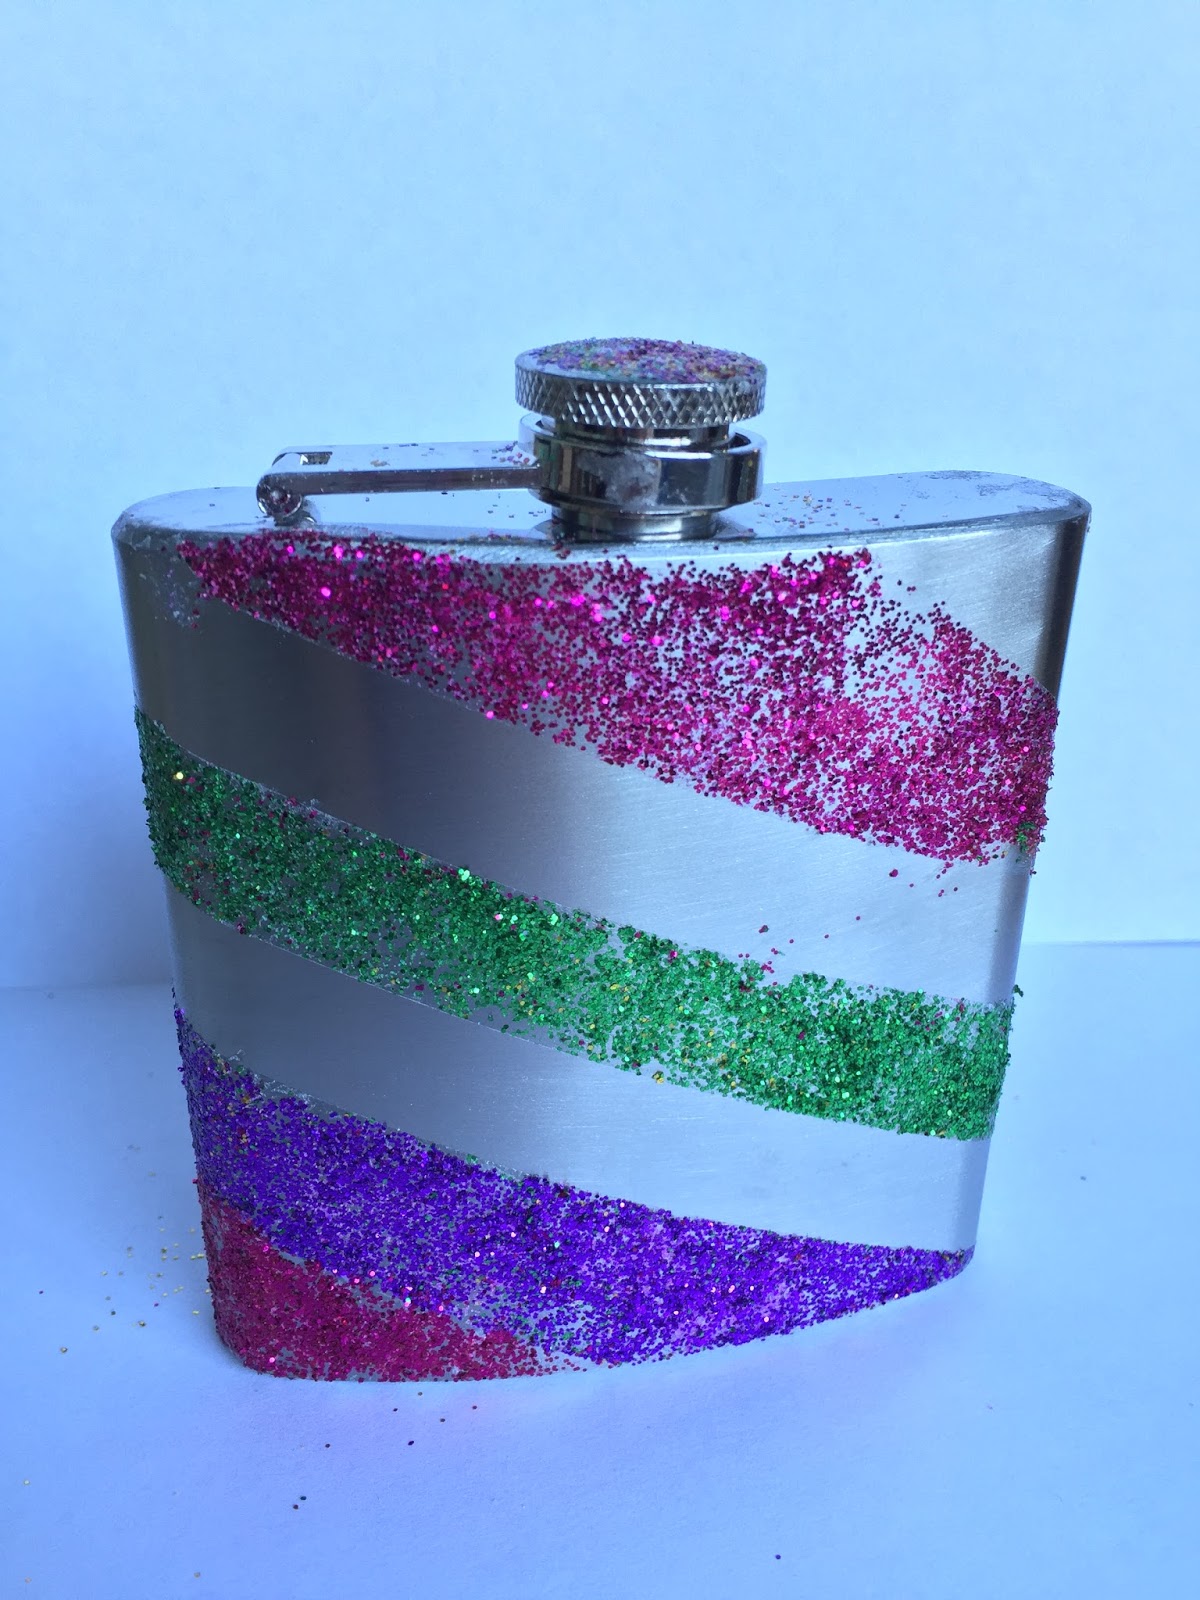
DIY Modge Podge Glitter Hip Flask


Supplies you will need;
  • Dishwasher safe Mod Podge Gloss 
  • Stainless Steel Hipflask
  • Glitter
  • Clear tape
  • Sponge (or something to apply glue)


Step 1 - Prepare the surface

Clean the flask in hot soapy water to make sure there isn't any dust or dirt on the surface.

Step 2 - Create design template 

Use the tape to create a design on the flask. This doesn't have to be perfect by any means, it's just an easy way to separate the different colour glitters.


Step 3 - Apply the glue

Using the sponge (or beauty blender/brush/hands/whatever you want), apply the Modge Podge in between the sections marked with tape. Try and apply and thin even coat so that it dries evenly.

Step 4 - GLITTER TIME!

I poured a small bit of glitter directly onto the glue and then used my fingers to even it out, just like finger painting with glitter ~ glitter painting even ~


I removed the tape and set it aside to dry for a few hours. I then repeated steps 3 & 4 until it was completely covered. To blend out the edges between the colours I took a small amount of glue and glitter on the sponge dabbed it on.

Step 5 - Finishing touches

I left it overnight to dry, just to be safe. I tapped it gently to remove any excess glitter and then sealed it to prevent any more glitter from falling off. The Modge Podge works as a gloss and a sealer, I applied two coats of this leaving about an hour in between each coat for drying time.


*Even though it does claim to be dishwasher safe I would not recommend putting this though the dishwasher. If you need to clean it, this is best done by hand washing it in warm water and not leaving it soaking in water for long periods of time as the glue may peel off!!

Until next time,
Sarah

Wednesday, 11 November 2015

Manicure on a Budget: Penneys False Nails

Tired of painting your nails and having to wait, what feels like, hours for them to dry?


On a budget and don't want to splash the cash for a salon manicure?


These nails are for you!


I've been wearing these false nails for about 2 years now and i'm hooked on them. No trip to Penneys is complete without picking up at least 3 new pairs. 

Just some of the reasons why I adore them;
  • Super easy to apply. 
  • Only €1.50 a go, you can't go wrong! 
  • Come with about 36 nails per pack, which means you have more than enough for replacements if you lose one, or better yet another full set 
  • The length is just right, not too long and not too short (no need for any tedious filing ~ happy days) 
  • They come in loads of different colours and patterns (including seasonal patterns, Snowflake nails anyone?) 
  • They can last up to 10 days*

*My top tip - Adhesive is included with the nails, although I don't think it's the best. Considering the price you can't really complain and it does the job if you only need them for a night or two, such as a special occasions. I prefer to get a bit more out of mine so I use the Broadway Nails Jet Dry Glue. When I use this glue I find the nails last about 8-10 days (if i'm careful with them) in comparison to 2/3 days with the glue provided. I pick this up in boots for about €4.50 for a twin pack and I get multiple uses from each bottle! Get it here.

The Application Process


Step 1: Preparation

Trim your natural nails and remove any nail polish that you are wearing.

Nails before

Step 2: The best fit

Select the nails that fit and lay them out in the order you will apply them.


Step 3: Apply the nails

I find it best to apply the glue to the false nail, place it on your natural nail and hold for about 10 seconds.

Broadway Jet Dry Glue

Step 4: Enjoy!


Until next time,

Sarah

Monday, 26 October 2015

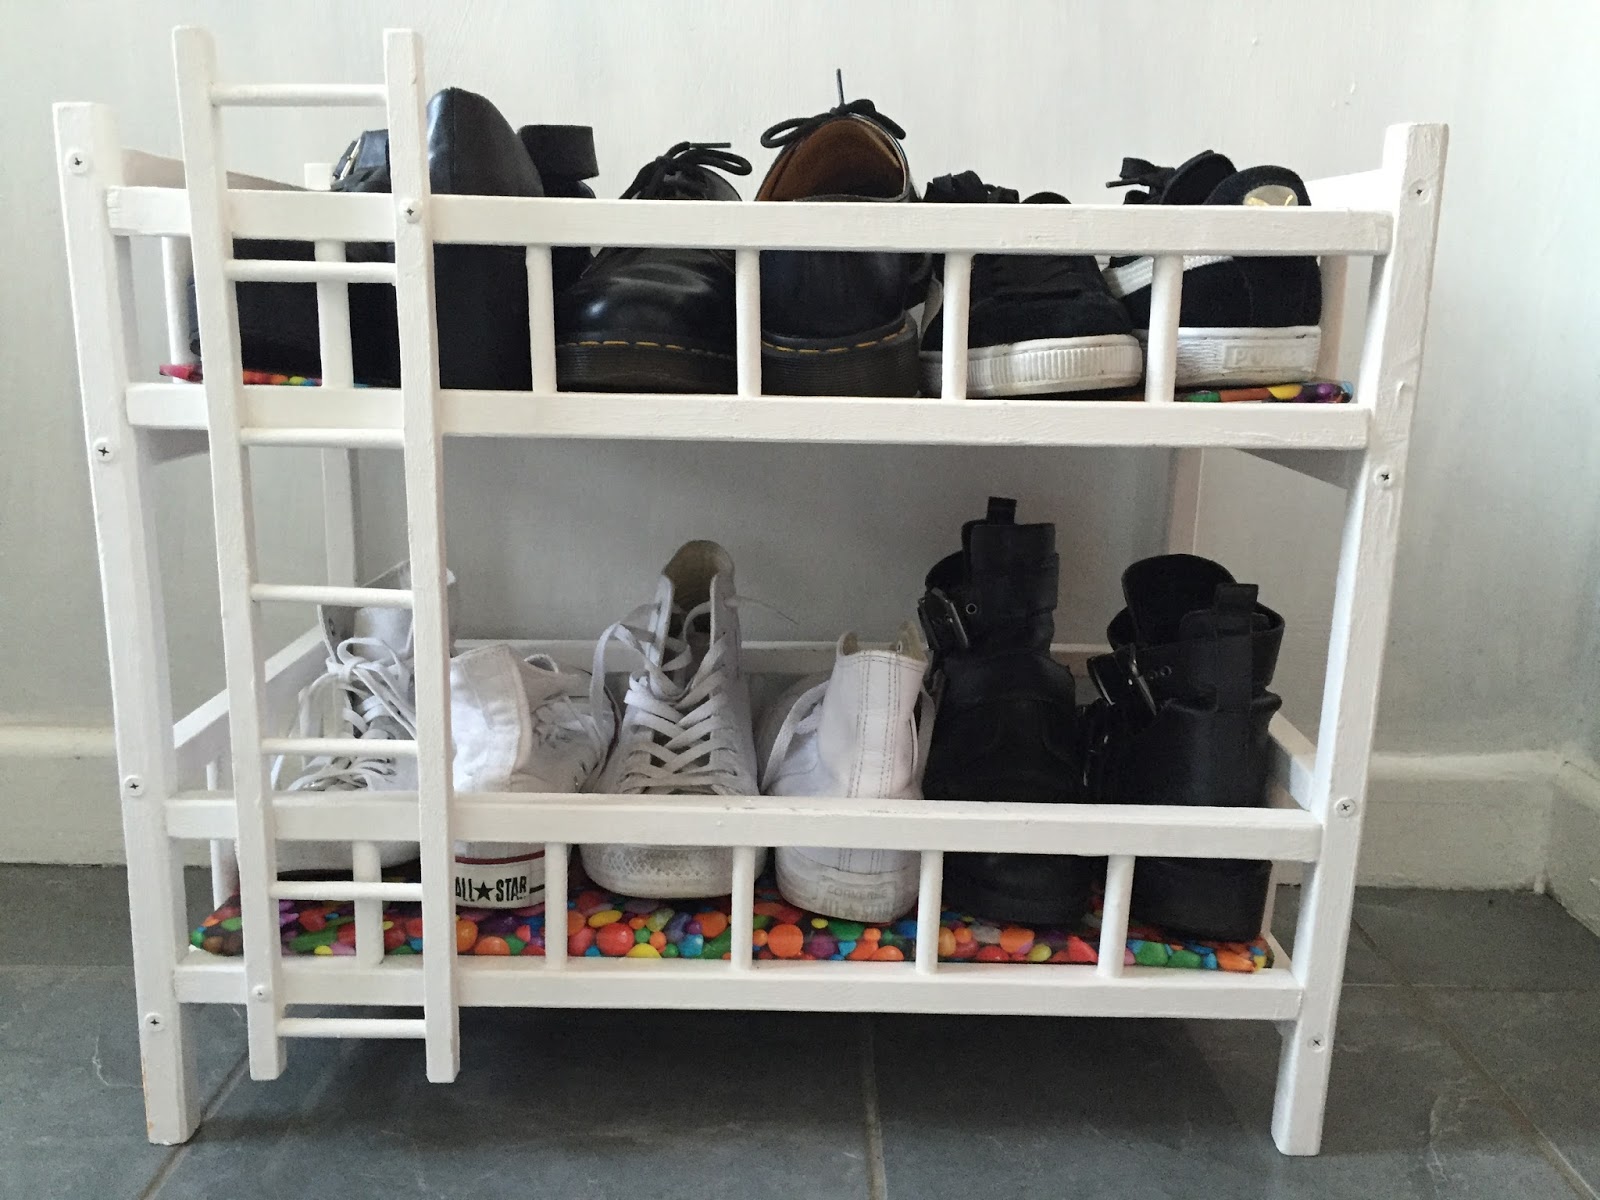
DIY: Alternative Shoe Rack


I've had this doll's bunkbed since I was quite young, I think it was a Christmas present. It served me well throughout my childhood although I think my days of putting baby Annabelle & Co. to bed in this are behind me. As of recent it has acted as a storage space for random old toys as well as clothes that didn't make it back into the wardrobe. 

I had a mini clear out recently and decided, rather than throw this out I could find a new purpose for it. I was in the market for a new shoe rack so this seemed like a good option!

The process of transforming it was as follows;


Step 1 - Collect materials & choose a working space

What I needed:
  • A paint brush 
  • Paint of choice 
  • Newspaper or something to cover the ground (it gets messy) 
  • A cloth for cleaning the surface 
  • Plastic gloves (optional) 

It was surprisingly sunny on the day I was working on this so I was able to work outside. I decided to use the Rust-Oleum Chalky Paint in the shade, Chalk White. I picked up at my local Woodies DIY Store, get it here.

Step 2 - Prepare the items surface

Before I began to paint I gave them a quick clean with hot soapy water to make sure there was no dust or dirt on them. Since I was using the chalky finish paint I didn't have to sand them (happy days for us lazy painters). 
 

Step 3 - Get painting!

Painting this was trickier than anticipated, getting in and around all of the bars and rails was quite a slow process. The bunkbeds started off in life as a bright yellow (see photo) and it only took 2 coats to get the bright white colour! When I had the first coat on I left it for about an hour, until it was touch dry, then I flipped it upside down and painted the hard-to-reach areas. I then left it overnight to dry and repeated the steps above.

Before

During

After

Step 4 - That extra touch

The plain chip boards between the bunks looked a bit dull after it was all painted up, so I decided to brighten them up. For this I simply took some colourful wrapping paper that I had lying around and glued it onto the boards using PVA glue. The bright colours are a great contrast to the white frame.


Ideally after using the chalky paint you would seal it with a coat of finishing wax to protect the piece of furniture. I decided to skip this step for now as I want to wait until it gets a naturally worn. Alternatively you could use sand paper to sand the edges and give it that vintage feel!

Step 5 - Fill it with all the shoes


This paint would be great for adding some life into old photo-frames, tables and any other items of furniture that are looking a bit dull. The possibilities are endless!

Until next time,
 
Sarah